Overnight oats

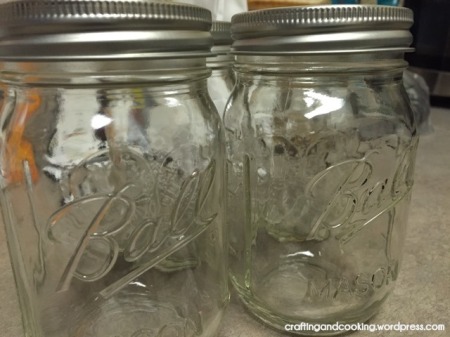
I always knew mason jars would somehow make their way into my home, but I thought that it would be for a project like paint-dipped mason jars or one of those layered salads. It never crossed my mind that it would be for oats.

Overnight Oats |  craftingandcooking.wordpress.com

Have you heard of overnight oats? Somehow, they’ve become supremely popular as of late. I see recipes all over Pinterest and Buzzfeed. So I went researching. Finding an actual definition of what overnight oats is is actually quite hard to find. Let me give my best explanation for you.

It’s cold oatmeal.

Ok, a little bit more on that. It’s oatmeal that you prep in a small container by adding a liquid to your oats and then sticking it in the fridge overnight. The oats start sucking up the liquid and it becomes soft. There’s still some texture, but it’s cold.  It also takes no time to set it up.

You can jazz up the oats with chia seeds, flavorings, nuts and fruit. I’m going to share the recipe I’ve perfected over the last couple of weeks: Peanut butter and honey overnight oats.

This recipe also travels well. I’m able to grab a mason jar out of my fridge each morning and eat it when I get to my desk. It’s filling and tasty.

Overnight Oats |  craftingandcooking.wordpress.com

All you need is old-fashioned oats, chia seeds, unsweetened vanilla almond milk, honey and powdered peanut butter. The powdered peanut butter is optional, but I like it.

Overnight Oats |  craftingandcooking.wordpress.com

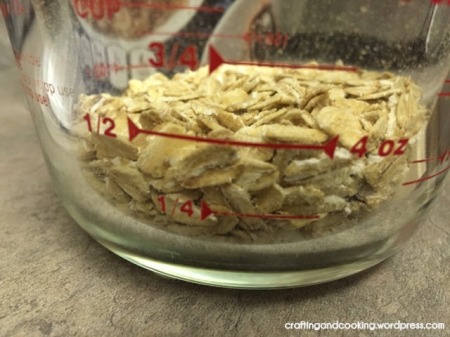
Start with half a cup of old-fashioned oats. I just use Quaker Oats and I have the really large container. Some recipes will call for steel cut oats, but those, true to their name, are definitely more crunchy. If you don’t like crunchy oatmeal, use the old-fashioned kind.

Overnight Oats |  craftingandcooking.wordpress.com

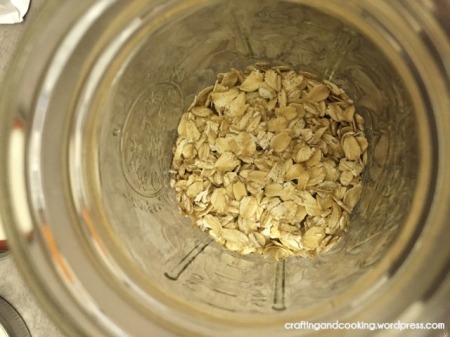
Take your oats and put them in the bottom of your mason jar.

Overnight Oats |  craftingandcooking.wordpress.com

Have you tried chia seeds before? Yep, they are the same seeds you put on your chia pet (or chia person) when you were younger. I never had one, but I know the ch-ch-ch-chia commercial pretty well.

I bought a15 oz. bag of chia seeds from Whole Foods, the 365 brand. It was cheaper to buy them this way versus the bulk section, which I thought was a bit odd.

Overnight Oats |  craftingandcooking.wordpress.com

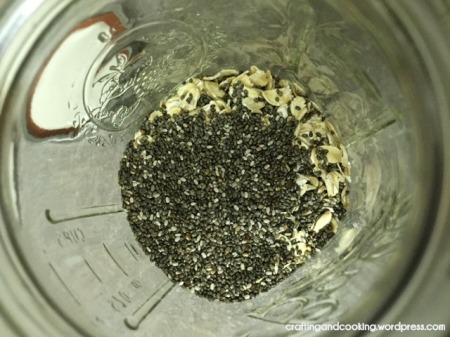
Put 1 tablespoon of chia seeds into the mason jar on top of the oats. I like how the chia seeds taste after they’ve sat overnight. They tend to puff up and I try popping them between my teeth.

Also, just a little bit of advice, make sure you do a mirror check after eating the oats just in case you have a rogue chia seed sitting in between your teeth. It happens.

Overnight Oats |  craftingandcooking.wordpress.com

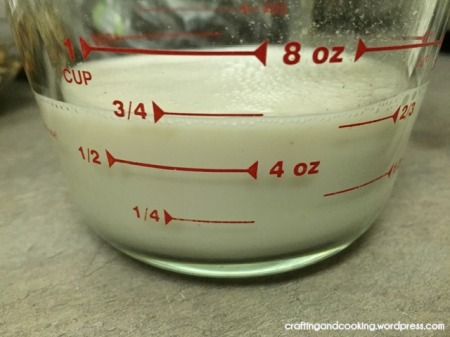
Then measure out 3/4 cup of the unsweetened vanilla almond milk. I go with unsweetened because you will be adding a sweetener and the sweetened version of vanilla almond milk can be very sugary.

Overnight Oats |  craftingandcooking.wordpress.com

Into the mason jar it goes!

Overnight Oats |  craftingandcooking.wordpress.com

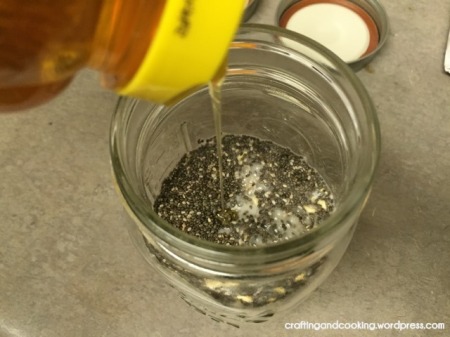
I drizzle in about a teaspoon of honey.

Overnight Oats |  craftingandcooking.wordpress.com

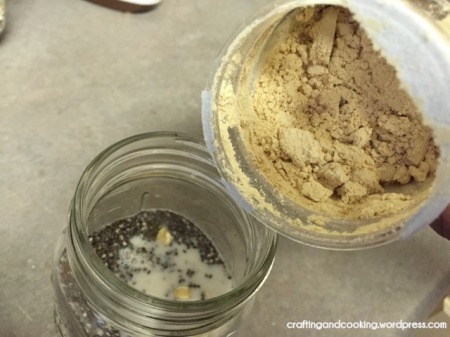
Here’s the powdered peanut butter. I had never used it before, but it seemed a lot easier to use than trying to get regular peanut butter in the mix. This is just the PB2 brand which seems to be sold at most stores now-a-days.

Overnight Oats |  craftingandcooking.wordpress.com

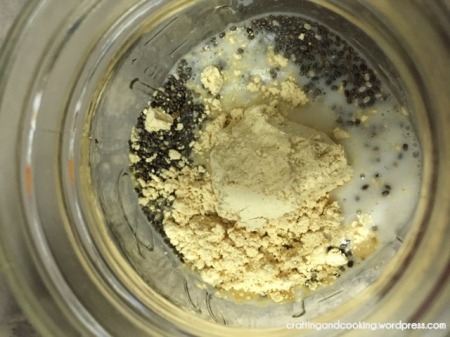
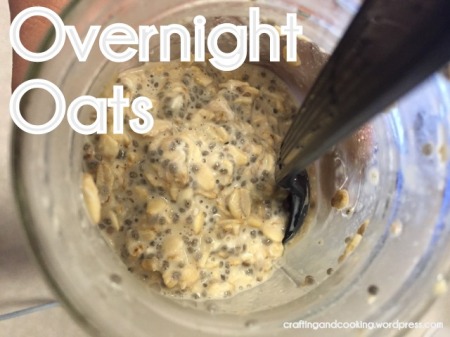
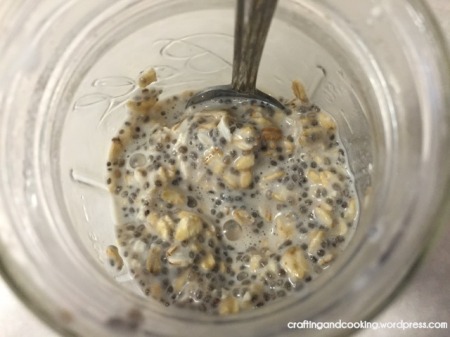
I eyeball the measurement here, but 1-2 tablespoons seems like a good amount. The peanut butter powder also seems to make the whole dish creamier. The photo at the top of this post has the peanut butter powder, while the bottom photo does not. See if you can tell the difference.

Overnight Oats |  craftingandcooking.wordpress.com

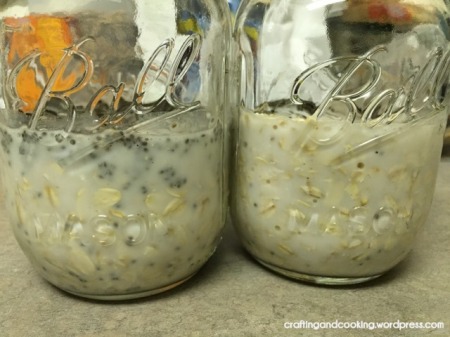
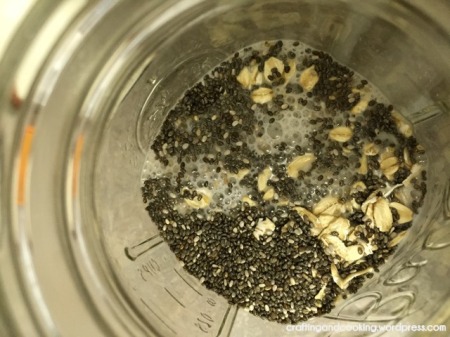
So at this point, it fills the mason jar halfway. Put the cap on and then shake it up! Shake it really good too.

Overnight Oats |  craftingandcooking.wordpress.com

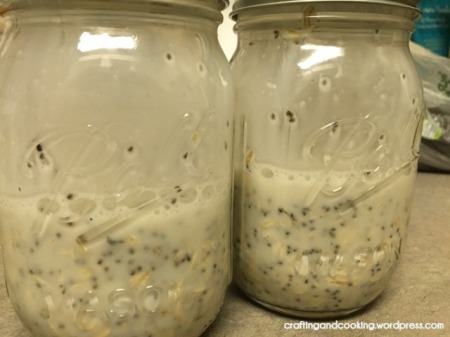
All combined! It’s important that you shake it really well because the honey needs to be incorporated. Sometimes it can pool so you get some spoonfuls with a bunch of honey and some without.

Stick your mason jar into the fridge overnight. I make a batch and it lasts for a couple of days.

Overnight Oats |  craftingandcooking.wordpress.com

There you go. Overnight oats. Great for breakfast. Now, you can just stop right here and eat these as is, but I sometimes add frozen bananas. Yours don’t need to be frozen, but that’s what I have on hand.

I’ve also done a version that uses Nutella. I didn’t add the peanut butter powder before I stuck the mason jar in the fridge overnight. The next morning, I stirred in a tablespoon of Nutella . Then I added frozen mixed berries. Pretty good. Although it took a lot of stirring to incorporate the Nutella into the oats.

So the possibilities are endless! I’m still experimenting with overnight oats, but I’m pretty happy with the peanut butter and honey version.

Overnight Oats recipe from Crafting and Cooking

Peanut butter and honey overnight oats
1 serving

1/2 cup old-fashioned oats
1 tablespoon chia seeds
3/4 cup unsweetened vanilla almond milk
1 teaspoon honey
1 to 2 tablespoons of peanut butter powder (optional)

Put all ingredients into a mason jar and cover with lid. Shake furiously to incorporate ingredients. Store covered in refrigerator overnight.

To eat: Uncover and stir ingredients. Add toppings such as fruit or nuts.

Honey Beer Bread

I am not a fan of beer. I just don’t get it. The taste has just never appealed to me. However, beer bread? That’s something I can get behind. I never stock beer in my fridge, but I usually can snag a leftover bottle from a family party. This is the second time I’ve made this recipe (originally from gimme some oven) and it’s super tasty and filling.

Plus, it’s a no knead, no rise, no yeast dough. It takes no time to make!

Honey Beer Bread 6

Doesn’t that look delish? It’s a bread that can be eaten as a side to a savory meal or sweetened up for breakfast or a snack.

Honey Beer Bread 1

Ingredients:
– a 12 oz. bottle of beer
– 2 tablespoons of honey
– 3 cups flour
– 1 teaspoon salt
– 2 tablespoons sugar
– 1 tablespoon baking powder
– 4 tablespoons melted butter

Start by preheating the oven to 350 degrees and greasing a loaf pan. Then, whisk together your dry ingredients (flour, salt, sugar and baking powder).

Honey Beer Bread 2

Stir in the honey and the beer to make a dough ball.

Honey Beer Bread 3

Pour half of the melted butter into the bottom of the loaf pan.

Honey Beer Bread 4

Spread the dough into the loaf pan.

Honey Beer Bread 5

Pour the rest of the melted butter on top of the dough. Now, I put the loaf pan onto a baking sheet and then into the oven for about 50 minutes or until a knife stuck into the middle of the loaf comes out clean. Let it cool slightly then serve!

Honey Beer Bread 7

Ooo some melted butter and a drizzle of honey? So good. And check out how deliciously golden the bottom of the bread came out.

Chocolate, cream cheese cake bars

I brought the pan of these (ok… I hoarded about three for myself) to work. They got rave reviews, although I had a hard time trying to figure out what to call them. I kept saying dessert bars. I got the recipe from Averie Cooks and they were originally called “White and Dark Chocolate Cream Cheese Chocolate Cake Bars.” A mouthful! And I mean… these are a mouthful too. A deliciously, gooey and amazing mouthful.

White and Dark Chocolate Cream Cheese Chocolate Cake Bars 8

Ingredients:

For the cake layer:
– 1 box of chocolate cake mix
– 1 stick (1/2 cup) of softened butter
– 1 egg
– 1 teaspoon vanilla
– 1-2 tablespoons water

For the top layers
– white chocolate chips
– semi-sweet, milk or dark chocolate chips (I used dark)
– 1 can of sweetened condensed milk
– 4 oz. of cream cheese, softened
– 1/2 teaspoon of vanilla

White and Dark Chocolate Cream Cheese Chocolate Cake Bars 1

Before you start this, line a 9×13 in. glass pan with aluminum foil. Spray the foil with cooking spray or wipe it down with vegetable oil. Also preheat the oven to 350 degrees.

In your mixer, add in the box of cake mix, the egg, the butter and vanilla. It’ll be a thick batter. I added 2 tablespoons of water so that all the batter/dry ingredient would be incorporated.

White and Dark Chocolate Cream Cheese Chocolate Cake Bars 2

Take the dough out of the mixer and use your hands to flatten it out in the pan. Try to make it as even across the entire pan as possible. You’ll also need to wash your hands at this point. You’ll be covered in cake dough.

White and Dark Chocolate Cream Cheese Chocolate Cake Bars 3

In the mixer, empty the can of condensed milk and put in your cream cheese and vanilla. Start mixing.

White and Dark Chocolate Cream Cheese Chocolate Cake Bars 4


Take your chocolate chips and spread them across the bottom layer.

White and Dark Chocolate Cream Cheese Chocolate Cake Bars 5

Your condensed milk should be smooth.

White and Dark Chocolate Cream Cheese Chocolate Cake Bars 6

Pour the condensed milk over the chocolate chips. You may need to spread the milk over the chocolate chips with a spatula.

White and Dark Chocolate Cream Cheese Chocolate Cake Bars 7


Bake for about 25 minutes. The middle of this won’t be set up. It’ll jiggle a bit. Try not to let the top layer get too brown. Let it cool. The more it cools, the more set up it will be. But I can tell ya, the very next day, this cake bar is still totally gooey.

Yum!

If you like the recipes and crafts on my blog, please make sure you like my page on Facebook.

Raspberry Hug, Pretzel and an M

Doing a twist on this recipe for Valentine’s Day.

Raspberry Hugs Pretzels and an M 6

Hershey’s released a raspberry hug for the holiday and I happen to love raspberry. This is such a simple recipe, and it lasts a while.

Raspberry Hugs Pretzels and an M 1

Ingredients: raspberry hugs, Valentine’s Day M&Ms and the Snaps Pretzels in the waffle pattern (or pretzel Os if you can find those)

Raspberry Hugs Pretzels and an M 2

Preheat the oven to 200 degrees. On a baking sheet, layout a bunch of pretzels.

Raspberry Hugs Pretzels and an M 3

Unwrap the hugs and place them on top of the pretzels. I think I had six hugs left from the bag and used the rest.

Raspberry Hugs Pretzels and an M 4

Stick the baking sheet into the oven. These seem to have a lower melting point than the peppermint and regular Kisses. So at 3 minutes, look at them. These were at 4 minutes and it’s almost too melted.

Raspberry Hugs Pretzels and an M 5

Quickly, put an M on each of the hugs/pretzels. Stick them in the fridge for a bit, so make sure they cool stay in their right form. Then enjoy!


Homemade Tootsie Rolls… almost

This was one recipe I was really hoping would turn out. I started off making it ok and then the end result was bad. Darn.

Homemade Tootsie Rolls 7

So these are the homemade tootsie rolls from Food 52. I had all the ingredients to start off with, so I thought why not.

Ingredients:
1/2 cup honey
1/4 cup plus 2 tablespoons unsweetened cocoa powder
1 teaspoon vanilla
1 tablespoon unsalted butter, melted
1/4 cup powdered sugar, sifted
Pinch of salt
1 to 1 1/4 cup instant non-fat dry milk powder

Homemade Tootsie Rolls 1

Start by whisking together the honey, cocoa powder and vanilla.

Homemade Tootsie Rolls 2

Looks sorta gloopy but smooth.

Homemade Tootsie Rolls 3

Add in your melted butter.

Homemade Tootsie Rolls 4

Then add in your powdered sugar.

Homemade Tootsie Rolls 5

Start adding in your milk powder.

Homemade Tootsie Rolls 6

Keep stirred until you can’t stir no more. Then you gotta knead it with your hands. I had just under 1 and 1/4 cup milk powder mixed in, but I might have needed more. You’re supposed to be able to create a ball with this dough that is firm and only slightly sticky. I thought I had achieved it. You need to then put the ball onto wax paper or something it won’t stick to.

Homemade Tootsie Rolls 8

The ball is supposed to spread out and be a little flatter when you let it rest like 5-10 minutes. Mine spread out way too much. It was still too gooey and not firm enough. I wanted to try cutting it anyway.

Homemade Tootsie Rolls 9

Ya… that so didn’t work out. I still ate a bunch of it, but it was just too sticky. I could really taste the honey in this, so I may have needed more cocoa powder. I definitely needed more milk powder though. Wish this had worked out.


Baked Mozzarella Sticks

Please tell me I’m not the only person who sees mozzarella sticks on a menu and considers eating a plate or basket full of them for their main meal. It’s pretty simple to make some of your own with the help of good ol’ string cheese.

Baked Mozzarella Sticks 8

I’ve used string cheese before to add cheese to a meal, like with the pizza crescent rolls. A nice melty cheese.

Baked Mozzarella Sticks 0

Start by chopping up a bunch of mozzarella sticks in half. Take the sticks and put them into the freezer. I left them in there for a few hours. This helps keep the cheese from becoming a big cheese puddle.

Baked Mozzarella Sticks 1

I took bread crumbs, parmesan cheese and a packet of Italian salad dressing mix and stirred it all together. I would play with this mixture until you find the right breading combo. This ended up a bit on the salty side. I’d probably cut the dressing mix and the cheese down and add more breading.

Baked Mozzarella Sticks 2

Set up your station. One bowl needs some flour. The second bowl needs at least one beaten egg, depending on how many mozzarella sticks you will be making, you may need one more. Third bowl is your breading. And then you need your baking sheet with aluminum foil.

Preheat your oven to 400 degrees before you pull the string cheese out of the freezer.

Baked Mozzarella Sticks 3

Coat the stick with flour.

Baked Mozzarella Sticks 4

Then coat it in the egg.

Baked Mozzarella Sticks 5

Then cover it with breading.

Baked Mozzarella Sticks 6

Lay all your sticks out on the baking sheet. My sticks were really frozen. So I ended up baking them for 10 minutes, then flipping them and baking them for another 4 minutes. But if yours aren’t that frozen, they may only need 10 minutess total. You’ll need to watch them.

Baked Mozzarella Sticks 7


There we go. Nicely browned mozzarella sticks! Not too melty. Serve with some marinara sauce.

Lazy Cake Cookies

I tried this recipe on a whim. My sweet tooth got the best of me one night. But I actually wasn’t sure if this would work. It seemed way too simple… but maybe that’s why it ended up working so well.

Lazy Cake Cookies 5

I really have to thank I’m a Lazy Mom for this great little recipe. I actually think it’s easier and faster than the Chocolate Chip Cookie in a Cup. Plus, there’s more than one cookie here.

Lazy Cake Cookies 1

Ingredients:
– one box of cake mix (I used a white cake)
– two beaten eggs
– 5 tablespoons butter, melted
– Chocolate chips (I used a 10 oz. bag of dark chocolate chips, but they are larger than semisweet)

That’s it. I have these ingredients in my pantry and fridge all the time!

Lazy Cake Cookies 2

Preheat your oven to 350 degrees. Mix together the beaten eggs, cake mix and melted butter.

Lazy Cake Cookies 3

Stir in the chips.

Lazy Cake Cookies 4

Grease a 9×13 pan and spread the batter out as best you can. My batter didn’t reach the edges, or spread that easily. I decided to just go with it. Put the pan into the oven and bake for 20 minutes.

Lazy Cake Cookies 6

Voila! Really simple and quick cookie bars. Takes half an hour total. How great is that?


Peanut Butter Cookie in a Cup

Next on Make That Pin week,  No. 2 Pencil’s Peanut Butter Cookie in a Cup. I’ve already made the Chocolate Chip Cookie in a Cup many times, so a peanut butter cookie sounded good.

Peanut Butter Cookie in a Cup 6

It really was good. Although I couldn’t wait for it to cool down, so I almost burned my mouth and windpipe on the tastiness.

Peanut Butter Cookie in a Cup 1

Start with a coffee mug. Put in a tablespoon of butter and a tablespoon of peanut butter. Stick that in the microwave for 30 seconds and stir.

Peanut Butter Cookie in a Cup 2

Next, stick in a tablespoon of sugar and brown sugar. Then a pinch of sugar and a little vanilla. Stir it all together.

Peanut Butter Cookie in a Cup 3

Then add in an egg yolk, none of the whites. Stir again.

Peanut Butter Cookie in a Cup 4

Finally, add three tablespoons of flour.

Peanut Butter Cookie in a Cup 5

This is what it should look like. It’s a pretty thick dough. Microwave it for 45 seconds. I did check it at 35 seconds, but it wasn’t ready. 45 was perfect.

Peanut Butter Cookie in a Cup 7

Look at how tasty that it! It’s a fluffy, single serving of peanut buttery goodness.

Head over to Crafting and Cooking on Facebook for more!

Frozen yogurt bites

Who hasn’t seen this pin floating around their Pinterest pages?

The frozen yogurt bites have been on my radar for a long time. I don’t know why I keep doing frozen things, since the temperatures are freezing outside, but I had to do this one, especially since I’ve declared it Make That Pin week.

Frozen Yogurt Bites 5

All you need is yogurt (I used vanilla Greek yogurt left over from yesterday’s recipe), a quart baggie and a sheet pan with aluminum foil.

Frozen Yogurt Bites 1

I started by filling the quart bag with four heaping tablespoons of yogurt.

Frozen Yogurt Bites 2

Then you start piping dots on to the sheet pan.

Frozen Yogurt Bites 3

Freeze the dots for at least two hours.

Frozen Yogurt Bites 4

They’re super yummy. Pop one in your mouth and it’s pretty satisfying. You could probably use these as a topping for other yogurt or ice cream. Eating by themselves are also good. They will start to melt pretty quickly! So I pulled them off the baking sheet, put them in a tuperware and put them back into the freezer.