Beef Stew

There are times when you just want a big bowl of beef stew. I recently discovered Pioneer Woman’s Sunday Night Stew. Delicious. I actually did make this on a Sunday. But I had to adapt it to my tastes. If you like turnips and onions, check out the original recipe! I go with carrots and green beans for my version.

Beef Stew  |  craftingandcooking.wordpress.com


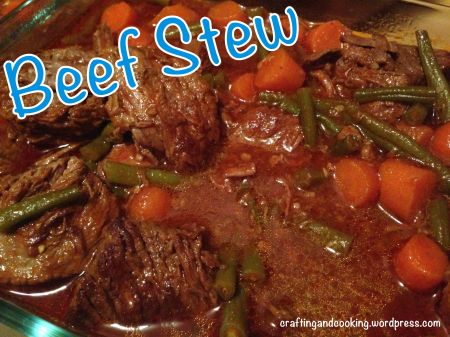
I think the broth is truly what makes this recipe great. The mixture of beef stock (which I’d never used before), tomato paste and Worcestershire make it so delectable.

Beef Stew  |  craftingandcooking.wordpress.com

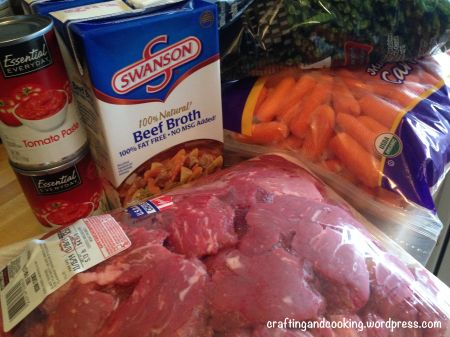
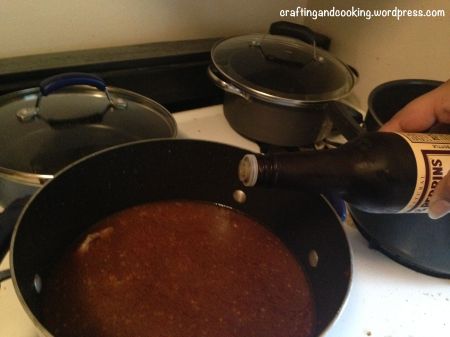
I actually made a double batch of this last time which is when I took the photo. It took two stock pots.

Ingredients:
1.5-2 lbs. of stew meat
32 oz. or 4 cups of beef broth, I would say have 1-2 cups extra depending on how thick or thin you like a stew
Olive oil
1 tablespoon of butter
A couple tablespoons of minced garlic
4-6 oz of tomato paste (usually the cans have 6 oz. so you don’t want to waste)
Onion powder
Worcestershire, probably 2 tablespoons or more. It’s to taste.
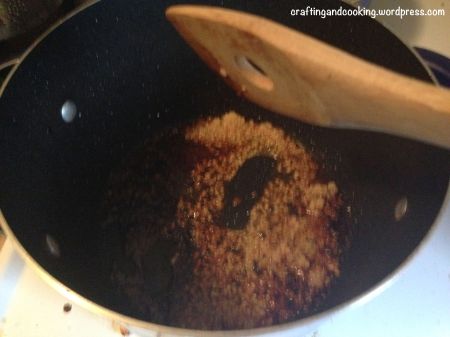
1/2 teaspoon of sugar
Salt and pepper
Carrots
Green Beans

Beef Stew  |  craftingandcooking.wordpress.com

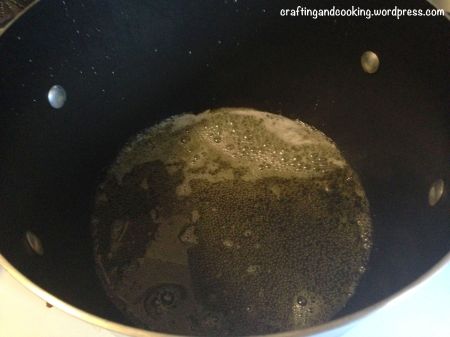
Start by heating about 3 tablespoons of olive oil in a pot with the tablespoon of butter. Let the butter melt.

Beef Stew  |  craftingandcooking.wordpress.com

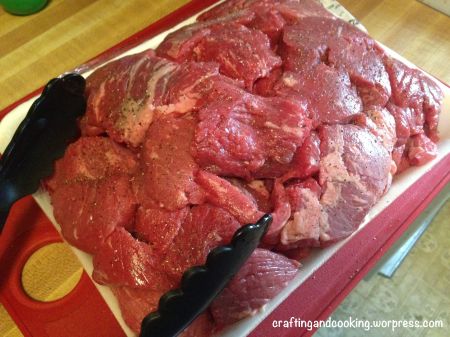
Season up the beef with salt and pepper before sticking them in the pot.

Beef Stew  |  craftingandcooking.wordpress.com


Do one layer of beef in the pot at a time. Give each piece of meat its own space.

Beef Stew  |  craftingandcooking.wordpress.com

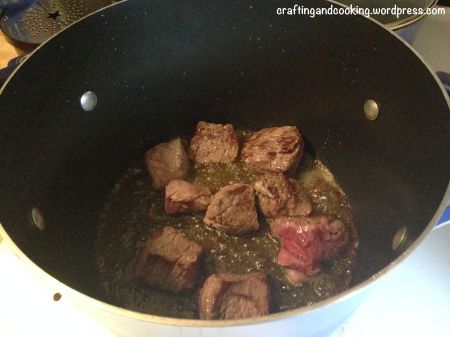
Brown the meat on all sides then pull it from the pot and put in a container off to the side. Do this with all the meat.

Beef Stew  |  craftingandcooking.wordpress.com


Add the garlic to the pan and brown slightly. Don’t let it burn.

Beef Stew  |  craftingandcooking.wordpress.com

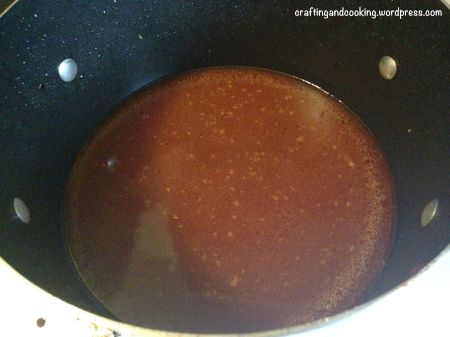
Add in the beef broth and the tomato paste. Stir so the tomato paste melts into the sauce.

Beef Stew  |  craftingandcooking.wordpress.com

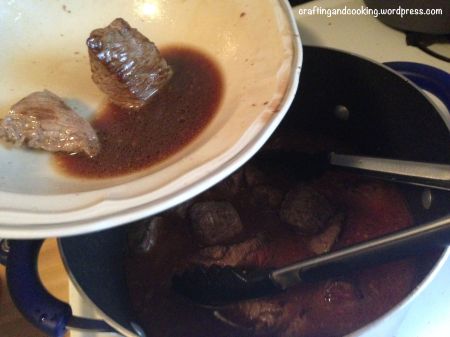
Add the meat, plus the drippings back into the pot.

Beef Stew  |  craftingandcooking.wordpress.com

Time for the Worcestershire. Again, the Worcestershire is to taste. I like a lot. Also, season with the salt, pepper, onion powder and add the sugar.

Bring the pot to a boil and then lower the heat. Let it stew for roughly an hour and a half with a lid. A lid is important.

Beef Stew  |  craftingandcooking.wordpress.com

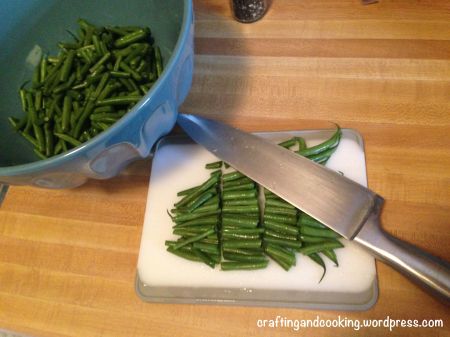
In that time, prep your green beans and your carrots.

Beef Stew  |  craftingandcooking.wordpress.com

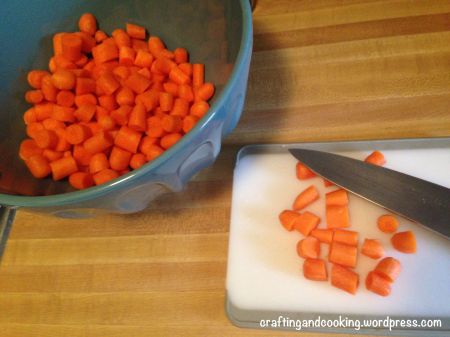
I actually use baby carrots for pretty much all my recipes. Why? They’re all roughly the same shape and size. So then you can cut them easily into smaller pieces. You also don’t have to peel baby carrots, so less time handling them.

Ok, so your hour and a half is up.

Beef Stew  |  craftingandcooking.wordpress.com

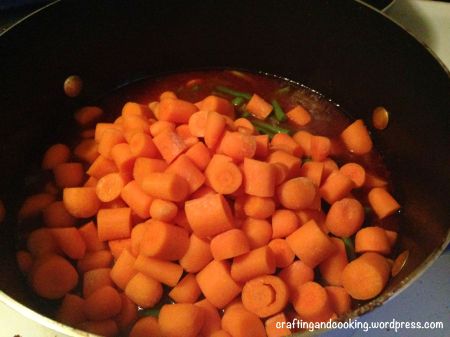
Add your carrots and green beans to the pot and stir. At this point, decide if there is enough broth in there for you. If it’s too thick, add more beef broth or even water.

Stew for at least another 30-40 minutes with the lid back on. You can test how soft the carrots are to see if the stew is done or not.

Beef Stew  |  craftingandcooking.wordpress.com

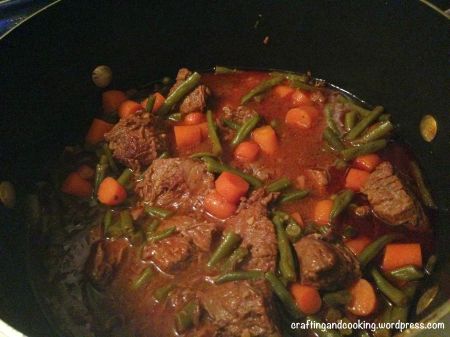
And there you have it! A beautiful stew with tender meat and it just fills you up. You can eat this by itself or it tastes good with mashed potatoes or rice. Yum! It freezes pretty good too. Either in tuperware or freezer bags.

Bacon-wrapped sweet and spicy chicken

Bacon. I wanted some. I wrote about a Baconfest recently and I have just been thinking about eating some bacon. So I decided to incorporate it into dinner. Plus, lucky me, I found an awesome deal on bacon.

Bacon-wrapped sweet and spicy chicken 1

This had a bit of kick to it, more than I expected. It smelled amazing (until the brown sugar started burning, but that’s besides the point).

Bacon-wrapped sweet and spicy chicken 6

Ingredients:
– At least three chicken breasts
– 1 lb. of bacon
– Salt, pepper, garlic powder, brown sugar
– Cayenne pepper or chili pepper

Bacon-wrapped sweet and spicy chicken 5

Preheat the oven to 400 degrees. Clean the chicken, then portion it out into two or three pieces per breast.

Bacon-wrapped sweet and spicy chicken 4

Season both sides of the chicken with salt, pepper and garlic powder. You can do the same with the cayenne pepper or chili powder. I used cayenne, but it ended up being a bit more spicy than I wanted. Take into account who will be eating it.

Bacon-wrapped sweet and spicy chicken 7

Wrap each piece of chicken with one slice of bacon.

Bacon-wrapped sweet and spicy chicken 3

Take each piece of bacon-wrapped chicken and roll it in the brown sugar.

Bacon-wrapped sweet and spicy chicken 2


Stick the chicken in the oven for 30-40 minutes. At 35 in my oven, the extra brown sugar on the pan starting to brown too much. So make sure to check it when it’s getting close.

Bacon-wrapped sweet and spicy chicken 8

Yum! Peas and alfredo pasta on the side.


Prosciutto, asparagus and parmesan spaghetti

This was one of the first recipes I tried off of Pinterest. It has become a huge hit and I rarely have leftovers when I make it for people. But it has also become a sort of treat, since prosciutto is a bit more expensive. It is worth it though.

Prosciutto, Asparagus and Parmesan Spaghetti 6

Although, I do end up munching on the prosciutto while I’m waiting to cook it. 🙂

The recipe is from ValSoCal. I did make a few changes from the original recipe. I’ve also been a little more free-wheeling with the ingredients since I usually end up with just slightly over what the original recipe calls for. My changes are in the parentheses.

Prosciutto, asparagus and parmesan spaghetti
adapted from ValSoCal
– 8 oz. angel hair pasta or spaghetti
– 1 and 1/4 cup heavy cream (or one pint)
– 4 oz. of prosciutto (or 6 oz. in a package)
– 1 lb. asparagus (I just grabbed a rubber-banded bunch from the store)
– 1/3 cup of parmesan cheese (I just used a couple handfuls)
– 1/2 teaspoon red pepper flakes
– salt and pepper
– garlic powder

Prosciutto, Asparagus and Parmesan Spaghetti 1

Start by boiling up your pasta according to the package directions. Chop of your asparagus. I usually chop into threes.

Prosciutto, Asparagus and Parmesan Spaghetti 2

Take your prosciutto and shred it into pieces.

Prosciutto, Asparagus and Parmesan Spaghetti 3

In a pan, use some olive oil and fry up the asparagus and prosciutto. It only takes a couple minutes. You still want the asparagus to be a little crunchy and bright green.

Prosciutto, Asparagus and Parmesan Spaghetti 4

Pour in your heavy cream, the cheese and then season with the salt, pepper and red pepper flakes. Stir and let the sauce thicken. It should only take about 4-5 minutes. Put your pasta into the pan and stir.

Prosciutto, Asparagus and Parmesan Spaghetti 5

Serve it up in a bowl. You could top with more parmesan or even some crispy bits of prosciutto. This is so good. It is better to eat it all the first night. It’s not as creamy if microwaved. I think I’d want to add in some peas or some spinach.


Marinara, alfredo pasta bake

Quick and tasty dinner recipe anyone?

Marinara, alfredo pasta bake 6

This is one yummy recipe. I don’t know why I haven’t mixed marinara and alfredo before. I found this recipe on Pearls, Handcuffs and Happy Hour.

Marinara, alfredo pasta bake 1

Ingredients:
– 1 jar of alfredo (mine was 16 oz.)
– 1 jar of marinara sauce (this was 23 oz.)
– 1 box of penne
– 2 cups of mozzarella cheese

Marinara, alfredo pasta bake 2

Make the box of pasta according to the box, or to your level of doneness. Drain the pasta. In the same pot, pour in your jars of sauce and the mozzarella cheese. Preheat the oven to 350 degrees.

Marinara, alfredo pasta bake 3


Stir and you get an orange/pink sauce.

Marinara, alfredo pasta bake 4

Throw your pasta back into the pot and mix it all together.

Marinara, alfredo pasta bake 5

Pour the pasta into a 9×13 dish. Stick the dish into the oven and bake for 20-25 minutes. The pasta will be bubbly. You can sprinkle shredded Parmesan cheese on top and bake for a few more minutes. I just sprinkled it on top and ate.

Marinara, alfredo pasta bake 7


Served up some peas along with this pasta. Awesome!

Crockpot Buffalo Chicken

I have a newfound love for Buffalo sauce, even though it sets my mouth on fire every single time. I found this recipe on Emily Bites and I had all the ingredients. The only thing I didn’t have was milk to tame the hotness. But it burned so good. ha!

Crockpot Buffalo Chicken 6

How good does that look?

Ingredients:
– 1 packet of ranch seasoning
– Boneless, skinless chicken breasts (I used 6, about 32 oz.)
– 1 bottle of Frank’s Buffalo sauce (12 oz.)
– 2 tablespoons butter
– Optional: blue cheese dressing, blue cheese crumbles or ranch

Crockpot Buffalo Chicken 1

Throw all the chicken, the Buffalo sauce and the packet of ranch seasoning into the crockpot. Cook it on high for 4-5 hours, or on low for double that.

Crockpot Buffalo Chicken 2

After 4.5 hours, the chicken should be falling apart. I didn’t have to pull it out of the crockpot to shred it. I just used a pair of tongs to shred it in the crockpot. All the sauce should have been absorbed into the chicken, but it’s also saucy.

Crockpot Buffalo Chicken 3

Turn the crockpot down to low if you’ve had it on high. Put in the two tablespoons of butter and cook for another half an hour.

Crockpot Buffalo Chicken 4

Then serve! You can try it on a tortilla for a buffalo chicken wrap.

Crockpot Buffalo Chicken 5

Or put it on a bun with the blue cheese crumbles and blue cheese dressing. Try throwing some of the chicken in with mac and cheese for buffalo chicken mac and cheese too.

This recipe gave me three tupperwares full of chicken. I had two smaller containers that had two portions each and one large container that has at least six more.


Baked Mozzarella Sticks

Please tell me I’m not the only person who sees mozzarella sticks on a menu and considers eating a plate or basket full of them for their main meal. It’s pretty simple to make some of your own with the help of good ol’ string cheese.

Baked Mozzarella Sticks 8

I’ve used string cheese before to add cheese to a meal, like with the pizza crescent rolls. A nice melty cheese.

Baked Mozzarella Sticks 0

Start by chopping up a bunch of mozzarella sticks in half. Take the sticks and put them into the freezer. I left them in there for a few hours. This helps keep the cheese from becoming a big cheese puddle.

Baked Mozzarella Sticks 1

I took bread crumbs, parmesan cheese and a packet of Italian salad dressing mix and stirred it all together. I would play with this mixture until you find the right breading combo. This ended up a bit on the salty side. I’d probably cut the dressing mix and the cheese down and add more breading.

Baked Mozzarella Sticks 2

Set up your station. One bowl needs some flour. The second bowl needs at least one beaten egg, depending on how many mozzarella sticks you will be making, you may need one more. Third bowl is your breading. And then you need your baking sheet with aluminum foil.

Preheat your oven to 400 degrees before you pull the string cheese out of the freezer.

Baked Mozzarella Sticks 3

Coat the stick with flour.

Baked Mozzarella Sticks 4

Then coat it in the egg.

Baked Mozzarella Sticks 5

Then cover it with breading.

Baked Mozzarella Sticks 6

Lay all your sticks out on the baking sheet. My sticks were really frozen. So I ended up baking them for 10 minutes, then flipping them and baking them for another 4 minutes. But if yours aren’t that frozen, they may only need 10 minutess total. You’ll need to watch them.

Baked Mozzarella Sticks 7


There we go. Nicely browned mozzarella sticks! Not too melty. Serve with some marinara sauce.

Tomato Mac

I was looking at past recipes on the site, and lo and behold, one of my go to recipes never made it here! Let me introduce you to one of the simplest recipes in my repertoire.

Tomato mac 3

It’s what I affectionately call Tomato Mac. You start with two boxes of mac and cheese. I use the powdered cheese type not the cheese sauce.

Tomato mac 1

Make the mac and cheese like you normally would. Just don’t make the sauce too runny.

Tomato mac 2

Pour in two cans of tomato sauce. Now, at this point you can also add in browned ground beef or turkey. I like my pasta plain most of the time.

Tomato mac 4


The last step is seasoning with garlic and onion powder plus black pepper. So simple and tasty.

Crockpot honey sesame chicken

It was time to bust out the crockpot again. I found these two recipes, from the Recipe Critic and Amy Bites. I combined the two recipes to create this version of Crockpot honey sesame chicken.

crockpot honey sesame chicken 7

And it was goooood. Not too sweet, not too spicy.

crockpot honey sesame chicken 2

Ingredients:
– 4-5 chicken breasts
– 3/4 cup honey*
– 1/2 cup soy sauce
– 1/4 cup ketchup
– 2 teaspoons minced garlic
– 2 tablespoons vegetable oil
– Onion powder, red pepper flakes** and pepper – just sprinkle a bit in
– 4 teaspoons of cornstarch and 1/3 cup water

* so, the amount of honey can vary from 1/2 cup to a full cup. I split the difference at 3/4 cup. Depends on how sweet you want it
** I only used a small bit of red pepper flakes. I don’t like spicy but I know this would taste good with even more.

crockpot honey sesame chicken 1

Start by sticking your chicken into the bottom of the crockpot.

crockpot honey sesame chicken 3

Whisk together the honey, ketchup, soy sauce, garlic, vegetable oil, pepper, red pepper and onion powder. Make sure you whisk it because it takes a little bit of work to incorporate all the honey. Otherwise it sticks to the bottom of whatever bowl you’re using.

crockpot honey sesame chicken 4

Pour the sauce over the chicken. I stirred the chicken a little bit so it was all coated. Turn the crockpot on low for 4 hours.

crockpot honey sesame chicken 5

At the four hour mark, pull all the chicken out of the crockpot and slice it up. Mix 4 teaspoons of cornstarch and 1/3 cup water together and pour that into the sauce that’s still in the crock pot. Turn the crockpot up to high and let it cook for 10 minutes more. It will thicken the sauce slightly.

crockpot honey sesame chicken 6


Put the chicken back into the crock pot. I also added steamed broccoli. Sprinkle in some sesame seeds. Serve it over rice and eat warm. Super good.

Ham and cheese rollups

I was looking in my fridge and I was trying to find something simple I could make without needing to run out to the store. Here comes the ham and cheese rollups, or ham and cheese crescent rolls.

ham and cheese rollups 6

Simple and the leftovers became both breakfast and snacks. Tastes good both warm and cold.

ham and cheese rollups 1

Ingredients: honey ham, swiss cheese slices, crescent rolls and dijon mustard

ham and cheese rollups 2

Start by unrolling the crescent rolls. Do this one at a time. Start by putting a dollop of dijon mustard onto the crescent roll and spreading it with the back of a spoon.

ham and cheese rollups 3

Take one slice of swiss cheese and rip it apart and layer it on top of the mustard.

ham and cheese rollups 4

Take a slice of ham and pile it on top of the cheese.

ham and cheese rollups 5

Roll up the crescent roll and spread a little more dijon mustard on the outside of the crescent roll. Finish rolling them up and then bake the crescents according to the package details.

ham and cheese rollups 7

The mustard will get crusty on the outside of the crescent rolls. The cheese will get all melty. It all perfectly pairs with the ham. So good. The only time I actually ate them warm was when they came out of the oven the first time. I then would grab one in the morning for breakfast as I was heading out the door.

Do you have any other crescent roll recipes you like to make? I’d love to hear about them! Share in the comments or head over to my Facebook page through the link at the right.

Totally Tasty Tuesdays Inside BruCrew Life

The BEST Ramen

I am more likely to grab a bowl of soup during winter, like most people. For years, I would stockpile Ramen. Not because of the price, but because I really do like it. Now this, this is the best Ramen I’ve ever had:

the best ramen 5


The Creamy Chicken flavor. It has eluded me for several years now because stores decide to stock the staples of beef and chicken. But then I found a store that has my favorite flavor. I will have to go back for more soon. I tend to eat this more like pasta versus a soup though.

And here’s the way I prepare my Ramen.

the best ramen 1

Put the noodle brick into a microwave safe bowl.

the best ramen 2


Then fill the bowl with just enough water to cover the noodle brick. Stick the bowl into the microwave for 6 minutes.


the best ramen 3

After 6 minutes, pull the bowl out of the microwave. I then add the flavor packet and a lot of frozen peas. You can add whatever you would like to the bowl at this time. Stir it up, to incorporate the flavoring to the bowl. Then stick it into the microwave for 4 minutes more.

the best ramen 4


After the 4 minutes, this is what you should see! More of a pasta, less of a soup. Delicious and hot. There are times I will add a hard boiled egg to the bowl. Yum. So delish.

Make sure you like Crafting and Cooking on Facebook. Follow my boards on Pinterest for more ideas.