Jewelry organizer

Hey all, sorry I’ve been absent as of late. Life has gotten a bit hectic.

I have been working on a couple of crafts. Remember that cake, cookie/treat stand I made? Well, I decided to use that idea to clear off my dresser:

Jewelry organizer Craftingandcooking.wordpress.com

For the full directions, check out my Homespun column. But it’s so simple and it’s been keeping everything accessory-wise in order. Love it!

As for food, I’ve been heading back to some new staples, particularly Crockpot Buffalo Chicken and Marinara, Alfredo pasta bake.

Versatile Valentine’s Wreath

Remember that yarn and ruffle wreath I made a couple months back? Well, I made it so the decoration was removable. I decided to change the decorations to a Valentine’s Day theme. I got a pile of felt and rather than just make one set of decorations, I wanted to show how versatile this wreath could be.

Versatile Valentine's Day wreath 2

Foam circles can be expensive. If you want to change up your wreaths depending on the holiday and the season, you don’t want to have to buy and store a dozen wreaths. I’m advising: Don’t glue your decorations on. Use pins! You can try and match the pins to your wreath theme or hide them strategically.

I also saw this pin and just had to try making these woven Danish hearts.

Versatile Valentine's Day wreath 1

It’s pretty simple one you get the hang of making these. Take two sheets of felt. Out of each sheet, you can get four felt strips (you can make four hearts). Take two strips and then round the edges. Fold them in half and cut three parallel lines. Then weave the strips together to make a heart! You can use these as little heart baskets or use them for what I did.

Versatile Valentine's Day wreath 4

So, I stuck the two woven hearts onto the wreath and then cut out two other hearts out of the same colors.

Versatile Valentine's Day wreath 5

Then I tried six hearts.

Versatile Valentine's Day wreath 3

Then two large hearts with three smaller layered hearts.

Versatile Valentine's Day wreath 6

Finally a pattern of hearts. I could have kept going. I just love that I can change up the decorations all I want. Right now I’ve left it with the two woven hearts.

Inside BruCrew Life

Top 5 posts of the year

This blog has only existed six months, but I wanted to round up my five favorite posts of the year.

I first started this blog, originally on Tumblr, as a way to keep track of some of my favorite recipes. I was going to create a cookbook of family recipes and other recipes I enjoyed making. Then I started creating the things I was pinning on Pinterest and my work took on a more crafty turn. It’s been great so far. I can’t wait to continue all my projects in the new year.

And here are my Top 5:

tape painted coffee mugs 5

These tape painted coffee mugs are actually not just my favorite post, but it’s the most clicked post on this blog. I’m writing this post while drinking coffee out of the yellow one right now. I had seen all these amazing mugs on Pinterest and Etsy and I had been determined to make some of my own. The tape painted mugs were born from frustration with other designs not coming out right. And I love them.

Salted Caramel Butter Bars 10

The salted caramel butter bars have been such a crowd pleaser. (hat tip to cookiesandcups.com for the original recipe). I introduced one of my friends to them and she’s been making them for her friends and family. And they keep referring to them as my “salty bars.” Which I find hilarious and slightly wrong. But seriously, it’s so hard not to just eat a ton of these at once. They’re rich and sweet and buttery. So good.

melted snowman ornament 6

I love this ornament. Oh, the poor melted snowman. He’s provided me with such joy. He’s made the perfect gift and brought a little bit of joy to other people.

scrapbook paper coasters 6

The scrapbook coasters, my very first post and craft for Crafting and Cooking. I’ve made them as gifts, I have them all over my apartment and I use them religiously. I bought a whole box of tiles to try different patterns and over the last few months, I’ve revamped the ways I’ve been making them — longer drying times, felt rounds on the backs… I wasn’t a coaster person until I made them. I only wish I could find the paper I used in the coasters in the photo.

bacon wrapped, blue cheese stuffed dates 6

It’s a bit of a mouthful to say bacon wrapped, blue cheese stuffed dates, but man are they good. I’ve made them for a game night, Thanksgiving and Christmas. At Christmas, the plate full of dates disappeared within half an hour. People are skeptical when they first look at these little treats, but then they have a pile of toothpicks in front of them in no time.

If you like my posts, please give Crafting and Cooking a like on Facebook. You can also follow all my pins on Pinterest.

Hand painted ornaments

I know it’s the day after Christmas, but I didn’t want to ruin the surprise by posting these on the blog beforehand. I handed out these cute ornaments to my family during our Christmas celebration.

handpainted ornaments 7

I’m really happy with these.

handpainted ornaments 1

So I found these porcelain stocking ornaments at Michael’s. I hated the red string they came with so I cut that off.


handpainted ornaments 2


I wanted to keep the trim at the top. So I used a small piece of masking tape to block it off.

handpainted ornaments 3

I did a quick coat of my different paints. I used the Martha Stewart craft paints I have that are perfect for porcelain. The Satin ones coated the best. I used one kind of Metallic, but it got gummy and bubbly. Take the masking tape off while the paint is still wet. Otherwise, you’ll end up pulling off some of the paint.

handpainted ornaments 4

I did the one side, let it dry for about an hour and then flipped it over and did the same on the other side. You can do a second coat if needed.

handpainted ornaments 5

After letting them dry on both sides, I used my holiday stencils (also Martha Stewart) and put one symbol on top of each stocking.

handpainted ornaments 6


Let them dry overnight. I wanted to make sure they were permanent and I didn’t have 21 days to let them cure. So I did bake them. Stick them in a cool oven on a baking sheet. Set the oven to 350 degrees. Once it hits 350 degrees, bake for half an hour and turn the oven off. I baked for 40 minutes total. Leave them in the oven as it cools down.

I then used my favorite fabric ribbon to restring them. Yay!

Something to pin and save for next year’s gifts!

Head over to the Crafting and Cooking Facebook page and give us a like. And check out the Christmas ideas board on Pinterest.

Handmade Christmas cards

I’m participating in my first Christmas card/craft exchange this year. It’s the first time I’m making a bunch of Christmas cards. I decided to go minimalist and simple.

handmade cards 5

I’m happy with how they turned out.

handmade cards 1


Supplies: card stock cut into card length, glue dots, three different types of Christmas scrapbook paper, a paper punch (I used a star)

Start by punching out a lot of shapes from the scrapbook paper.

handmade cards 2


Then come up with a pattern. I used three stars cut from each piece of scrapbook paper for a total of 9 stars.

handmade cards 4


Helpful tip: Prep your whole project by cutting out the cards and folding them. Then pull off the amount of glue dots you need for each card with the paper backing intact. Then stick your 9 star shapes onto the glue dots. Saves time from doing it one by one.

handmade cards 3


Then just apply the stars to your card in a pattern that makes you happy! Very simple and it’s a little something extra for your Christmas cards.

Head over to the Crafting and Cooking Facebook page and give us a like. And check out the Christmas ideas board on Pinterest.

Snowflake tealight holder

I was looking to make something that is both holiday appropriate and could still be kept around once the holidays are over. Something wintery seemed great. I had gotten a bunch of snowflake stencils recently and I had a few blank tealight holders left over from the glitter tealights I made before.

I’m really happy with how these came out, and just like snowflakes, neither one is the same.

Snowflake tealight holder 6


Supplies: glass paint, tealight holders, stencils and foam brushes

Snowflake tealight holder 1

I used four kinds of Martha Stewart craft paint: Wedding cake, wet cement, surf and sea lavendar, all in the satin finish. In hues of white, blue and gray. Totally winter right?

Snowflake tealight holder 2

You only need a little bit of paint for this entire project. A little dollop of paint is all you need. I will say I didn’t use much of the wet cement paint. It looks like a nice gray when it’s on the plate there, but it sorta looked like a dingy and dirty snowflake.

Snowflake tealight holder 3

I put the stencils all around the tealight holder. I let some hang off the holder so they would look like they were falling snowflakes.

Snowflake tealight holder 4

Dab the paint onto the stencil. I went all the way around the tealight holder before pulling the stencils off. I didn’t want the paint to dry all the way, because I’ve experienced the paint pulling off the glass with the stencil when it’s too dry. If there are some larger gaps between the pattern, you can fill them in with other stencils. If you want to paint over the other snowflakes, let them dry at least an hour.

Snowflake tealight holder 5


Love! Simple and pretty.

I’m going to follow the curing method that’s just leaving them out for 21 days. Otherwise you could bake them for 30 minutes at 350 degrees. You put the glasses into the cold oven, turn the oven on and let it hit 350 degrees. Then start the half an hour counter. Then turn the oven off and let them cool. Then they should be set. You need to wait 24 hours for them to dry before the baking method, btw.

Head over to the Crafting and Cooking Facebook page and give us a like. And check out theChristmas ideas board on Pinterest.

Inside BruCrew Life

Glitter on the inside ornaments

I think one of the worst things about Christmas is the glitter. However, one of the best things about Christmas is the glitter. You can’t win! Well, you can at least minimize the terrible glitter hands that come with the sparkly and really pretty ornaments that you hang on your tree.

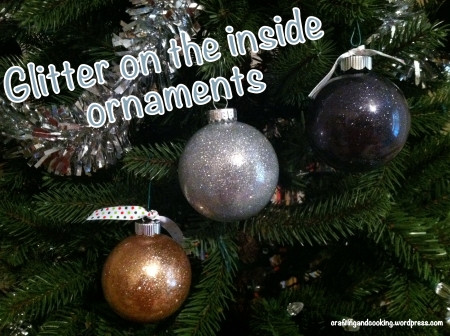
I present to your: Glitter on the inside ornaments!

glitter on the inside ornament 13

They are super pretty and take no time to make. Finding the specific Pledge you need to make the inside of the glitter sticky was the most difficult part of this.

They’ll also make great gifts and you can even decorate the outside of the ornament, like putting the year and a family’s last name on it.

glitter on the inside ornament 1

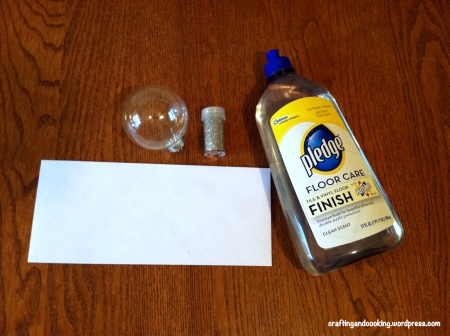
Supplies: an envelope, clear ornaments, glitter and Pledge Floor Care Tile & Vinyl Floor Finish

I had to go to four stores to find the right pledge, this one has the blue top and the Futura symbol. I eventually found it at Wal-Mart. Target one that was orange scented, I don’t know if I’d want orange smelling ornaments.

Tip: The Pledge is super sticky. If you use it, then store it for awhile, run the top under hot water. It will loosen the cap and the topper. Don’t struggle with it before running the water cause it’s a fruitless battle.

Also, I highly suggest using a superfine glitter. You can use whatever kind of glitter you want, but superfine covers the inside of the ornament amazingly, no empty spaces or gaps between the glitter.

glitter on the inside ornament 2

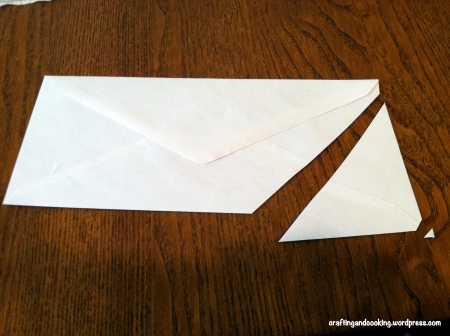
Cut the corner off the envelope and then snip off the tip of that. That will be your funnel. Put it to the side for the glitter portion of this crafting excursion.

glitter on the inside ornament 3

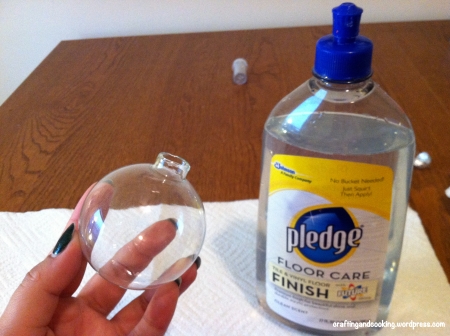
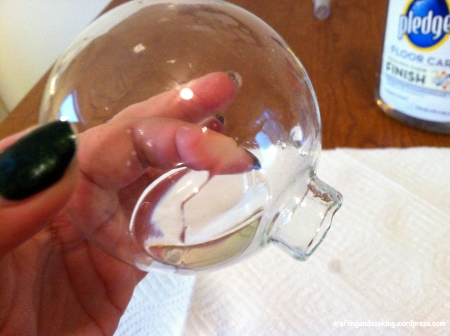
Take the metal top off the ornament.

glitter on the inside ornament 4

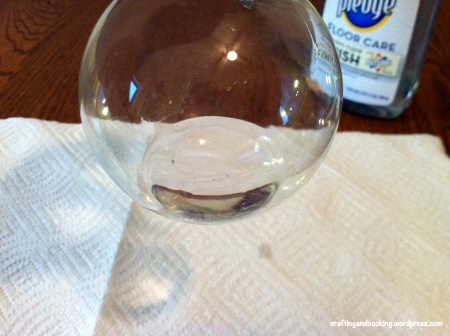
Squirt a little bit of the Pledge in the ornament.

glitter on the inside ornament 5

Start gently rolling the Pledge around in the ornament. Don’t shake it. You don’t want bubbles forming.

glitter on the inside ornament 6

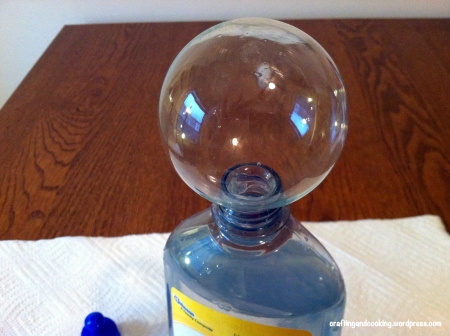
Open up the cap of the bottle and put the ornament into there upside down, in order to get rid of the excess liquid.

glitter on the inside ornament 7

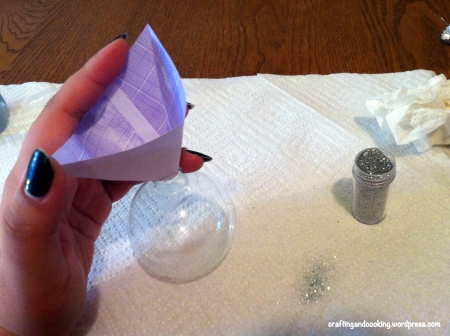
Take your funnel and put it into the ornament then pour in your glitter.

glitter on the inside ornament 8

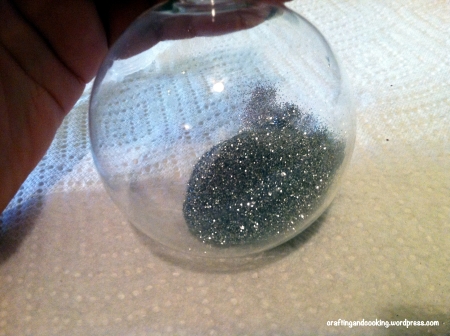
About two tablespoons worth I think.

glitter on the inside ornament 9

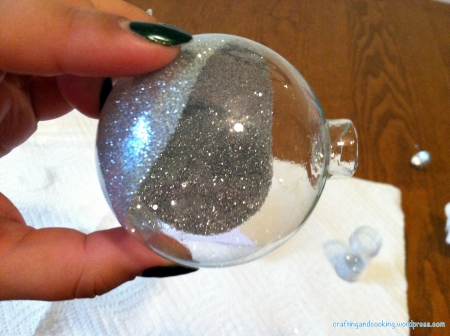
Again, roll the glitter to get the best coverage.

glitter on the inside ornament 10

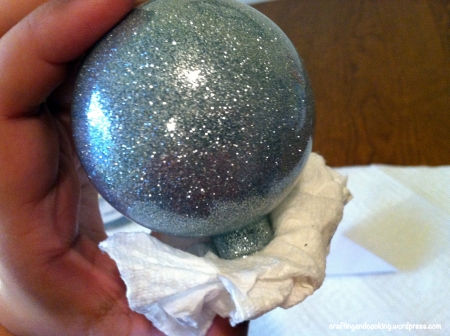
Before you get to the top of the ornament, either get a paper towel or use your thumb to cover the opening. You don’t want to spill glitter everywhere and you want to make sure you get the last bits of the ornament covered in glitter. Pour out the excess glitter back into the glitter container.

glitter on the inside ornament 11

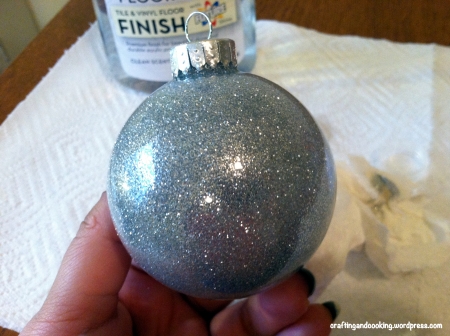
Pop the metal topper back on and you’re all set!

glitter on the inside ornament 12

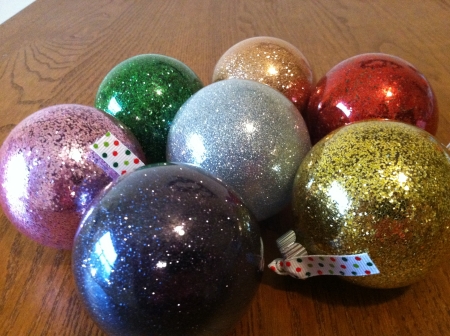
Look! Pretty glitter ornaments, no glitter on your hands. If you look at the gold and pink ornaments, those are done with normal glitter (bought at the dollar store). You can see some of the gaps. But it’s really not noticeable unless you’re picky (like me!) or you look really close. Also, I love the purply black ornament in front and the champagne gold one in the back. Those were also made with superfine glitter (found at Hobby Lobby).

Have any fun ornaments you’ve made? I’d love to see them! Share links in the comments or head over to my Facebook page, Crafting and Cooking. Don’t forget to check out the Christmas ideas Pinterest board.

making monday marvelous linky party DIY Show Off

Wedding invitation ornament

If you’re like me, you have been getting invited to a lot of weddings lately. After the wedding is done, I feel bad just tossing out the invitation.

This feeling has grown since one of my best friends got married last year. I helped her put together all those invites (because I was the maid of honor), with the ribbon and the two charms that needed to be tied on and all the little pieces of tissue paper and on and on. It’s so labor intensive just to end up in the trash. I did end up re-using the invite she sent me by including it in a photobook I created with all the photos I took throughout the year of festivities.

I got this fabulous idea at from glitter to gumdrops. It’s an awesome way to provide the couple with a personalized gift. I think I might do this for all the invites I get in the future. Although, if the bride uses Pinterest, there’s a good chance she might have seen the original pin as one of my other friends did. She posted a photo on Facebook of her ornament.

Supplies: wedding invitation, clear glass ornament, a paper slicer, ribbon (the one I used for this ornament was tied around the invite) and a pencil

Start by slicing up the wedding invite into strips.

Use the pencil to curl up the invite strips. I did it at an angle so that it looked a tad bit fancier.

You’ll end up with a pile of curls. Some of them, you’ll need to trim and use as filler for spots in the ornament.

Twist the curls into the ornament.

I used the pencil to help arrange the curls so that the words would show among the other curls.

There you go. a really pretty ornament for the newlyweds. As I said in the supply list, the ribbon I used for this ornament was provided by the invite sender. If your invite didn’t give you a ribbon, try finding one that matches the wedding’s colors. If there’s a charm included with the invite, try tying that onto the outside. You can also write in Sharpie on the outside of the ornament their last name and the date of their wedding.

Head over to the Crafting and Cooking Facebook page and give us a like. And check out the Christmas ideas board on Pinterest.

Katie's Nesting Spot The 36th AVENUE Thirty Handmade Days

Festive pom-pom ornament

When you’re at the craft store, try and avoid impulse buys. Although, this impulse buy totally worked out for me. Sparkly, holiday pom-poms make a great ornament filler.

Supplies: Glass ornaments and holiday pom-poms

What do you do? Just shove them in there. The really large pom-poms do take a little more pressure. Don’t try too hard though, you don’t want glass shards embedded in your hand if you accidentally break the ornament.

I mentioned how these sorta look like atoms or whatever to my science-loving boyfriend. He wanted to try and make some that were actual representations of said atoms or elements because the ones I made weren’t exact and he had no idea what they represented. haha.

I fancied up the ornaments with my favorite ribbon.

Like Crafting and Cooking on Facebook and check out the Christmas ideas Pinterest board.

Lil\'Luna

Santa pants terra cotta pot

Seriously, I feel like this project can be used so many ways. I saw it originally on this blog. I did it slightly different, using pant instead of electrical tape for the belt.

Supplies: One terra cotta pot, Martha Stewart craft paint in Satin – Habanero and High Gloss – Beetle Black, a permanent glue like E-6000 and one washer that fits the lip of the pot

Start by painting the bottom part of the pot in the Habanero paint.

Paint the lip of the pot in the Beetle Black. Also paint the inside lip because there’s a chance you’ll be able to see that from the outside. Give the pot two coats and let it dry. Take the washer and put it onto the lip of the pot with the permanent glue. Let it dry for several hours.

Then you can fill the pot:

You can try filled it with a mini-Christmas tree. Or how about a poinsettia plant? You could fill it with treats for the kids. Maybe line it with parchment paper and make it a popcorn bowl at your holiday gathering. If you have a mantle, try making two and putting it at either end and fill with ornaments or something. See! So many options.

Like Crafting and Cooking on Facebook. Follow the Christmas ideas board on Pinterest.

making monday marvelous linky party BWS tips button Sew Chatty DIY Show Off