Versatile Valentine’s Wreath

Remember that yarn and ruffle wreath I made a couple months back? Well, I made it so the decoration was removable. I decided to change the decorations to a Valentine’s Day theme. I got a pile of felt and rather than just make one set of decorations, I wanted to show how versatile this wreath could be.

Versatile Valentine's Day wreath 2

Foam circles can be expensive. If you want to change up your wreaths depending on the holiday and the season, you don’t want to have to buy and store a dozen wreaths. I’m advising: Don’t glue your decorations on. Use pins! You can try and match the pins to your wreath theme or hide them strategically.

I also saw this pin and just had to try making these woven Danish hearts.

Versatile Valentine's Day wreath 1

It’s pretty simple one you get the hang of making these. Take two sheets of felt. Out of each sheet, you can get four felt strips (you can make four hearts). Take two strips and then round the edges. Fold them in half and cut three parallel lines. Then weave the strips together to make a heart! You can use these as little heart baskets or use them for what I did.

Versatile Valentine's Day wreath 4

So, I stuck the two woven hearts onto the wreath and then cut out two other hearts out of the same colors.

Versatile Valentine's Day wreath 5

Then I tried six hearts.

Versatile Valentine's Day wreath 3

Then two large hearts with three smaller layered hearts.

Versatile Valentine's Day wreath 6

Finally a pattern of hearts. I could have kept going. I just love that I can change up the decorations all I want. Right now I’ve left it with the two woven hearts.

Inside BruCrew Life

Snowflake tealight holder

I was looking to make something that is both holiday appropriate and could still be kept around once the holidays are over. Something wintery seemed great. I had gotten a bunch of snowflake stencils recently and I had a few blank tealight holders left over from the glitter tealights I made before.

I’m really happy with how these came out, and just like snowflakes, neither one is the same.

Snowflake tealight holder 6


Supplies: glass paint, tealight holders, stencils and foam brushes

Snowflake tealight holder 1

I used four kinds of Martha Stewart craft paint: Wedding cake, wet cement, surf and sea lavendar, all in the satin finish. In hues of white, blue and gray. Totally winter right?

Snowflake tealight holder 2

You only need a little bit of paint for this entire project. A little dollop of paint is all you need. I will say I didn’t use much of the wet cement paint. It looks like a nice gray when it’s on the plate there, but it sorta looked like a dingy and dirty snowflake.

Snowflake tealight holder 3

I put the stencils all around the tealight holder. I let some hang off the holder so they would look like they were falling snowflakes.

Snowflake tealight holder 4

Dab the paint onto the stencil. I went all the way around the tealight holder before pulling the stencils off. I didn’t want the paint to dry all the way, because I’ve experienced the paint pulling off the glass with the stencil when it’s too dry. If there are some larger gaps between the pattern, you can fill them in with other stencils. If you want to paint over the other snowflakes, let them dry at least an hour.

Snowflake tealight holder 5


Love! Simple and pretty.

I’m going to follow the curing method that’s just leaving them out for 21 days. Otherwise you could bake them for 30 minutes at 350 degrees. You put the glasses into the cold oven, turn the oven on and let it hit 350 degrees. Then start the half an hour counter. Then turn the oven off and let them cool. Then they should be set. You need to wait 24 hours for them to dry before the baking method, btw.

Head over to the Crafting and Cooking Facebook page and give us a like. And check out theChristmas ideas board on Pinterest.

Inside BruCrew Life

Glitter on the inside ornaments

I think one of the worst things about Christmas is the glitter. However, one of the best things about Christmas is the glitter. You can’t win! Well, you can at least minimize the terrible glitter hands that come with the sparkly and really pretty ornaments that you hang on your tree.

I present to your: Glitter on the inside ornaments!
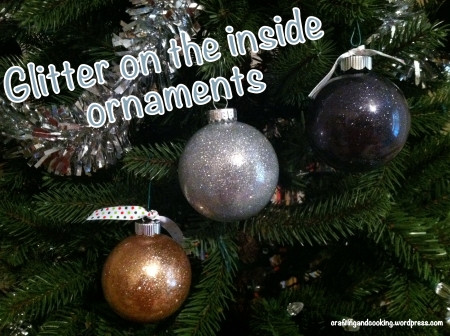
glitter on the inside ornament 13

They are super pretty and take no time to make. Finding the specific Pledge you need to make the inside of the glitter sticky was the most difficult part of this.

They’ll also make great gifts and you can even decorate the outside of the ornament, like putting the year and a family’s last name on it.
glitter on the inside ornament 1

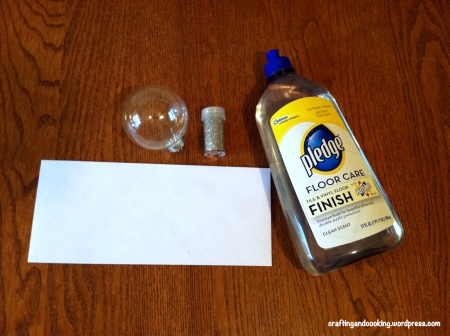
Supplies: an envelope, clear ornaments, glitter and Pledge Floor Care Tile & Vinyl Floor Finish

I had to go to four stores to find the right pledge, this one has the blue top and the Futura symbol. I eventually found it at Wal-Mart. Target one that was orange scented, I don’t know if I’d want orange smelling ornaments.

Tip: The Pledge is super sticky. If you use it, then store it for awhile, run the top under hot water. It will loosen the cap and the topper. Don’t struggle with it before running the water cause it’s a fruitless battle.

Also, I highly suggest using a superfine glitter. You can use whatever kind of glitter you want, but superfine covers the inside of the ornament amazingly, no empty spaces or gaps between the glitter.
glitter on the inside ornament 2

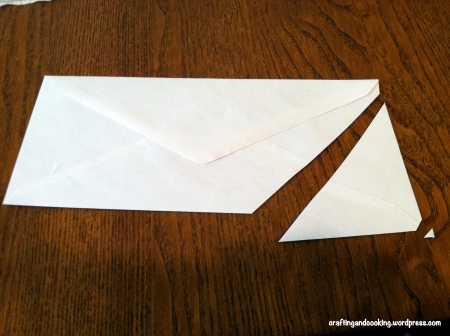
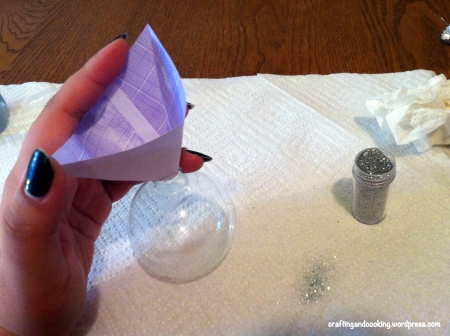
Cut the corner off the envelope and then snip off the tip of that. That will be your funnel. Put it to the side for the glitter portion of this crafting excursion.
glitter on the inside ornament 3

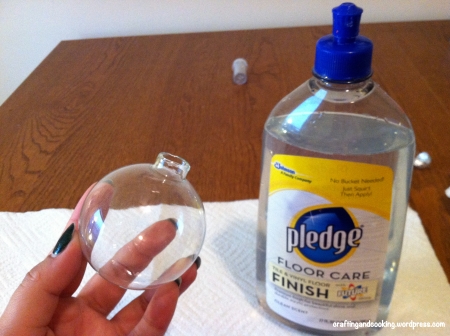
Take the metal top off the ornament.

glitter on the inside ornament 4

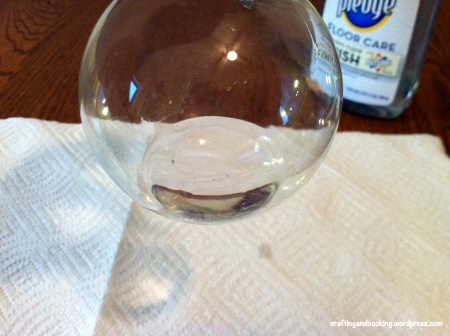
Squirt a little bit of the Pledge in the ornament.
glitter on the inside ornament 5

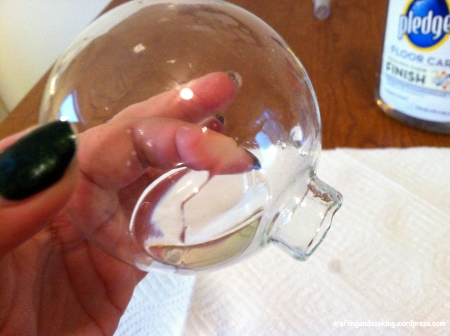
Start gently rolling the Pledge around in the ornament. Don’t shake it. You don’t want bubbles forming.
glitter on the inside ornament 6

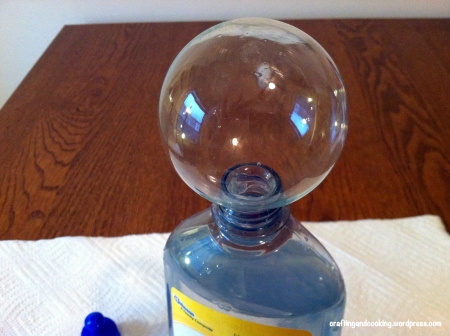
Open up the cap of the bottle and put the ornament into there upside down, in order to get rid of the excess liquid.
glitter on the inside ornament 7

Take your funnel and put it into the ornament then pour in your glitter.
glitter on the inside ornament 8

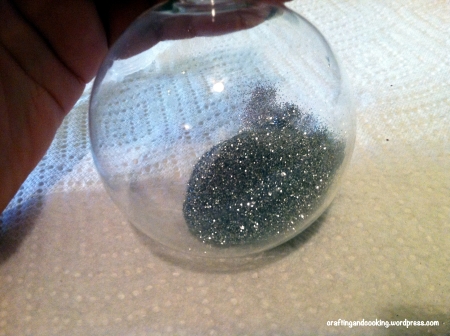
About two tablespoons worth I think.

glitter on the inside ornament 9

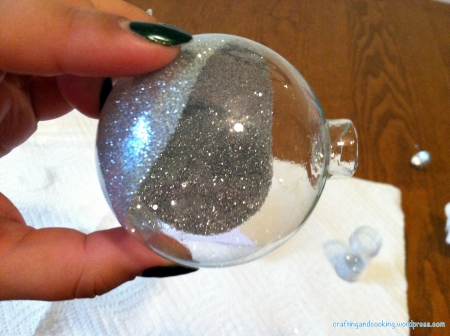
Again, roll the glitter to get the best coverage.
glitter on the inside ornament 10

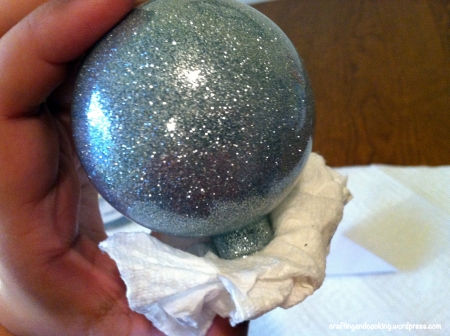
Before you get to the top of the ornament, either get a paper towel or use your thumb to cover the opening. You don’t want to spill glitter everywhere and you want to make sure you get the last bits of the ornament covered in glitter. Pour out the excess glitter back into the glitter container.
glitter on the inside ornament 11

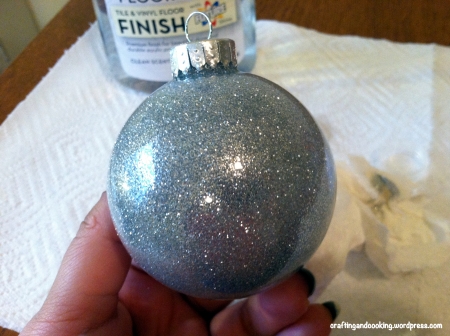
Pop the metal topper back on and you’re all set!
glitter on the inside ornament 12

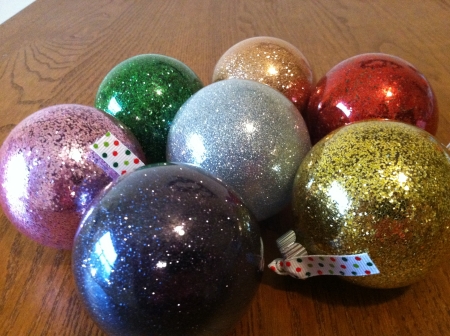
Look! Pretty glitter ornaments, no glitter on your hands. If you look at the gold and pink ornaments, those are done with normal glitter (bought at the dollar store). You can see some of the gaps. But it’s really not noticeable unless you’re picky (like me!) or you look really close. Also, I love the purply black ornament in front and the champagne gold one in the back. Those were also made with superfine glitter (found at Hobby Lobby).

Have any fun ornaments you’ve made? I’d love to see them! Share links in the comments or head over to my Facebook page, Crafting and Cooking. Don’t forget to check out the Christmas ideas Pinterest board.

making monday marvelous linky party DIY Show Off

Wedding invitation ornament

If you’re like me, you have been getting invited to a lot of weddings lately. After the wedding is done, I feel bad just tossing out the invitation.

This feeling has grown since one of my best friends got married last year. I helped her put together all those invites (because I was the maid of honor), with the ribbon and the two charms that needed to be tied on and all the little pieces of tissue paper and on and on. It’s so labor intensive just to end up in the trash. I did end up re-using the invite she sent me by including it in a photobook I created with all the photos I took throughout the year of festivities.

I got this fabulous idea at from glitter to gumdrops. It’s an awesome way to provide the couple with a personalized gift. I think I might do this for all the invites I get in the future. Although, if the bride uses Pinterest, there’s a good chance she might have seen the original pin as one of my other friends did. She posted a photo on Facebook of her ornament.

Supplies: wedding invitation, clear glass ornament, a paper slicer, ribbon (the one I used for this ornament was tied around the invite) and a pencil

Start by slicing up the wedding invite into strips.

Use the pencil to curl up the invite strips. I did it at an angle so that it looked a tad bit fancier.

You’ll end up with a pile of curls. Some of them, you’ll need to trim and use as filler for spots in the ornament.

Twist the curls into the ornament.

I used the pencil to help arrange the curls so that the words would show among the other curls.

There you go. a really pretty ornament for the newlyweds. As I said in the supply list, the ribbon I used for this ornament was provided by the invite sender. If your invite didn’t give you a ribbon, try finding one that matches the wedding’s colors. If there’s a charm included with the invite, try tying that onto the outside. You can also write in Sharpie on the outside of the ornament their last name and the date of their wedding.

Head over to the Crafting and Cooking Facebook page and give us a like. And check out the Christmas ideas board on Pinterest.

Katie's Nesting Spot The 36th AVENUE Thirty Handmade Days

Festive pom-pom ornament

When you’re at the craft store, try and avoid impulse buys. Although, this impulse buy totally worked out for me. Sparkly, holiday pom-poms make a great ornament filler.

Supplies: Glass ornaments and holiday pom-poms

What do you do? Just shove them in there. The really large pom-poms do take a little more pressure. Don’t try too hard though, you don’t want glass shards embedded in your hand if you accidentally break the ornament.

I mentioned how these sorta look like atoms or whatever to my science-loving boyfriend. He wanted to try and make some that were actual representations of said atoms or elements because the ones I made weren’t exact and he had no idea what they represented. haha.

I fancied up the ornaments with my favorite ribbon.

Like Crafting and Cooking on Facebook and check out the Christmas ideas Pinterest board.

Lil\'Luna

Santa pants terra cotta pot

Seriously, I feel like this project can be used so many ways. I saw it originally on this blog. I did it slightly different, using pant instead of electrical tape for the belt.

Supplies: One terra cotta pot, Martha Stewart craft paint in Satin – Habanero and High Gloss – Beetle Black, a permanent glue like E-6000 and one washer that fits the lip of the pot

Start by painting the bottom part of the pot in the Habanero paint.

Paint the lip of the pot in the Beetle Black. Also paint the inside lip because there’s a chance you’ll be able to see that from the outside. Give the pot two coats and let it dry. Take the washer and put it onto the lip of the pot with the permanent glue. Let it dry for several hours.

Then you can fill the pot:

You can try filled it with a mini-Christmas tree. Or how about a poinsettia plant? You could fill it with treats for the kids. Maybe line it with parchment paper and make it a popcorn bowl at your holiday gathering. If you have a mantle, try making two and putting it at either end and fill with ornaments or something. See! So many options.

Like Crafting and Cooking on Facebook. Follow the Christmas ideas board on Pinterest.

making monday marvelous linky party BWS tips button Sew Chatty DIY Show Off

Cookie and treat stand

Making your own treat/cookie/cake stand is a pretty popular thing on Pinterest. I find all the holiday ones very alluring. But before choosing to do this craft, I had to come to grips with the fact that I don’t have enough cabinet space to store treat stands for every season. I also wanted a glass or porcelain stand, not one made with a melamine or plastic plate.

I’m happy with what I made. I chose a plate with a plain green rim. It’s perfect for Christmas and any other season. And I’m pretty stoked with the price: less than $4 to make this! I had the glue from a previous craft, so if you don’t have the glue that’ll add to your stand’s cost, but it should still be less than $10.

Supplies: a plate, a candle holder (from Dollar Tree) and a permanent craft glue like E-6000.

Flip your plate over and figure out where the center of it is.

Line the rim of the candlestick holder with your glue.

Place your candlestick into that middle spot and press down firmly. If the glue seeps out a bit, don’t worry. It dries pretty much clear.

Put pressure on the drying candlestick holder. I used a couple of heavy cookbooks that I had handy. I let the stand dry for several hours like this. Just forget about it.

Once your stand is dry wash it and it’s ready to use! I would only hand wash it from now on too. I sort of like the glass base as is, but I still might paint it white so it blends in with the plate better.

This would make a great gift for someone, even a host/hostess gift, too. Put some cookies or a pie on top, wrap it up nice with some cellophane and leave it for your party host or a loved one.

You can always add more layers to this too, make a cupcake stand or a stand for multiple cookie varieties. You can add a second plate to the bottom for two layers. Add another candlestick holder and plate to the top for three.

If you make a stand of your own please share in the comments or on the Crafting and Cooking Facebook page. And you can find plenty of Christmas crafts on the idea board on Pinterest.

The 36th AVENUE Katie's Nesting Spot Somewhat Simple

Ribbon tree

Stores start trotting out all sorts of little decorative trees. Well… I thought “I could do that.” And I’m really loving my ribbon tree.


Supplies: a bunch of ribbon spools, a styrofoam cone (mine is 8″), a bunch of straight pins with the little colored tops


I used about five spools of ribbon for this project, but I also used a thinner ribbon. If you use something wider, it’ll be less. I’m just in love with this ribbon pattern. I got it from Michael’s, if you want to know. I’ve used it as a decorative tie for all my homemade ornaments. Love.


Fold the ribbon in half and stick a pin through it. Then stick it into the bottom of the cone. You need to decide how much you want the ribbon to pool at the bottom.

I let my ribbon touch the table and bell out slightly. Keep going all the way around the cone with this layer.


After finishing the first layer, I started the next layer up about an inch higher than the first layer.


I didn’t want a star at the top of my tree or any sort of decoration. So before I got to the topmost layers of my ribbon tree, I covered the flat top of the cone with some ribbon. Then I lined up the last layer with the top of the cone to finish it off.


Yay. Pretty.

Remember to like Crafting and Cooking on Facebook and follow the Christmas ideas board on Pinterest.

Lil\'Luna SNAP!

Melted snowman ornament

I made this ornament back in October as soon as I saw this pin on Pinterest. I thought it was the most adorable thing ever. My mom thinks it’s morbid. I can deal with that. Morbid adorableness. Ha! I also featured it in my latest Homespun column.

Does the photo make him look like he’s screaming no? hehehehe I’m sorry. It’s so funny.

Supplies: salt, peppercorns, orange Post-It notes and a glass ornament.

So the original ornament uses an orange cone. I thought the orange Post-It notes would be so much easier. Now, you need to fold over just the sticky part so it sticks to the other part of the Post-It. It’s so the snowman’s nose will be thicker than just cutting out a triangle from the rest of the Post-It.

Fill your ornament with salt. It’s a couple tablespoons.

Pop in a bunch of peppercorns. The one above has eight, but I actually think seven is better. That way, five will make the mouth and two will make the eyes.

There you go! Your snowman is melted. Pop the top on and then hang it on your tree. The insides do move. I’ve found that people like playing around with it like a little puzzle toy to make the best face or to bury the eyes and nose.

My friend and I were trying to come up with other characters we could melt inside an ornament.

Like Crafting and Cooking on Facebook and follow the Christmas Ideas board on Pinterest.

Inside BruCrew Life

Fluffy Felt Rosette Wreath

Remember when I said no Christmas until Black Friday? Well this wreath ended up on my door early Friday morning.

I went on a wreath making spree one day, first there was the yarn and ruffle wreath and now a fluffy felt rosette wreath. The inspiration for this fabulous wreath came from Domestifluff.

Plus, I upp’d the holiday factor by tying on a fancy fabric bow, the tutorial for that went up last week. So you can definitely use this bow for decorating and other crafts and not just wrapping your presents.

Supplies: Lots of white felt sheets cut into circles, a 12 inch styrofoam wreath, lots of straight pins and the supplies for the fabric bow (optional)

I had 14 sheets of white felt. I got 7-8 circles out of each piece of felt. So 14 x 8 = 112 circles. In the supplies photo, you can see a silver ink and the lid of a mason jar. I tried maya*made’s way to cut out lots of circles:

Use the mason jar lid and the stamp pad to make perfect circles to cut around. But… I ran into a problem. The silver wasn’t light enough and left a sort of dingy mark on the circle edges. If this wasn’t a 3-D project, and I could have put the inked side down, this would have been a lifesaver. Instead I used the ink circles I cut out as a template for the rest.

Take your circle, fold it in half and then in half again to make a little rosette.

Take your pin and stick it into the corner of the rosette, then attach it to the wreath.

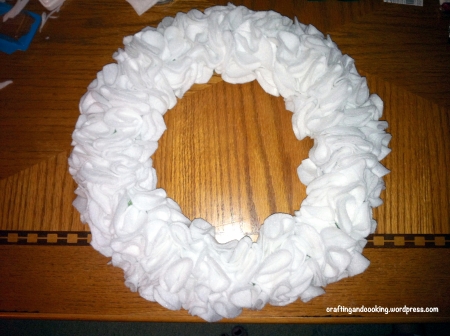
Keep making rosettes and attaching them to the wreath. Fluff them out, fill in gaps.

Only do the spots you’re going to be able to see. Go all the way around the wreath until you run out of circles and there are no more spaces.

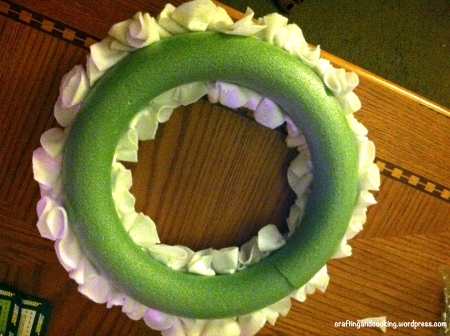
Flip the wreath over.

I used a little piece of ribbon to create a door hanger. I attached it with three pins.

I tied the fabric bow on, a little off center. Looks nice right? Love it.

Have any wreath ideas of your own? Please share them in the comments. Don’t forget to like Crafting and Cooking on Facebook. And remember to follow my Christmas ideas board on Pinterest, it’s always being updated.

making monday marvelous linky party BWS tips button Sew Chatty